

An L-shaped kitchen layout with an island can connect an open-plan home while adding prep space, storage, and casual seating. But a poorly sized island can narrow walkways, block appliance doors, and interrupt the route between the refrigerator, sink, and cooktop.
Start with measurements and everyday habits, not the island itself. This guide explains how to check room dimensions, position an island, arrange appliances, and plan seating, storage, lighting, and costs. All measurements are given in inches and approximate centimeters. Building codes and accessibility requirements vary by location, so check local rules before construction.
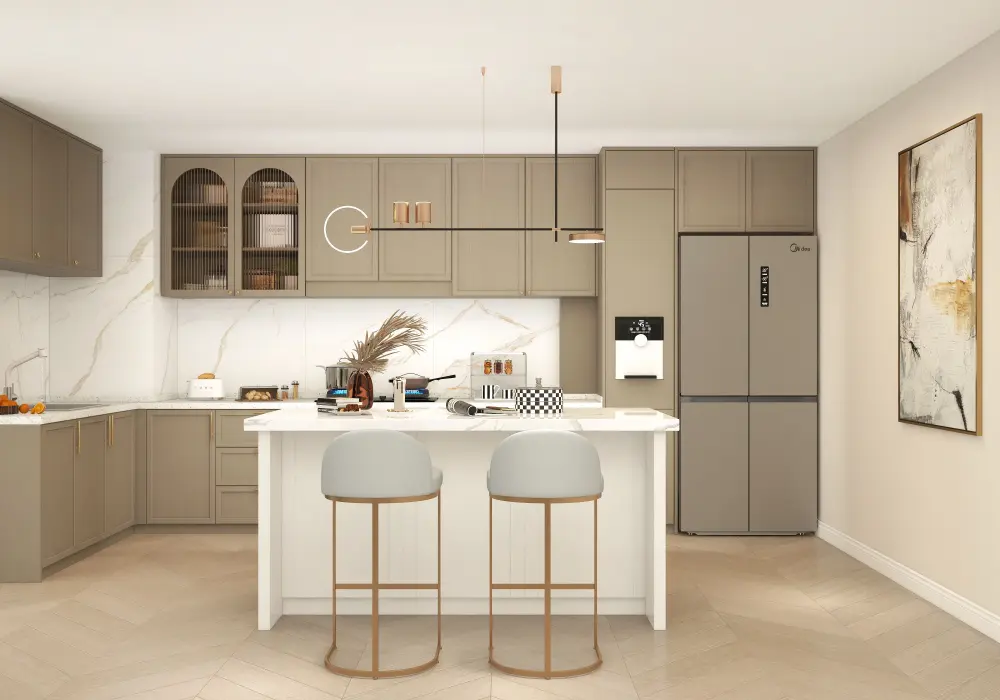
72" Modern Style Laminate Kitchen Islands
Table of Contents
L-Shaped Kitchen Island Dimensions: Will It Fit?
Measure the usable floor area before choosing finishes. The key figure is room depth from the wall behind the longer cabinet run to the open edge of the room. Allow about 12 ft (3.7 m) for a compact island, or 13–14 ft (4.0–4.3 m) if you want seating. These are starting estimates, not universal minimums; appliance doors, island shape, and circulation all affect the fit.
Choose Island Dimensions for Your Kitchen Size
Kitchen size | Approximate cabinet runs (long × short) | Suggested island size |
Small | 8–10 ft × 6–8 ft (2.4–3.0 m × 1.8–2.4 m) | 4–5 ft long × 24–30 in deep (1.2–1.5 m × 60–75 cm) |
Medium | 10–12 ft × 8–10 ft (3.0–3.7 m × 2.4–3.0 m) | 5–6 ft long × 30–36 in deep (1.5–1.8 m × 75–90 cm) |
Large | 12–16 ft × 10–12 ft (3.7–4.9 m × 3.0–3.7 m) | 8–10 ft long × 36–48 in deep (2.4–3.0 m × 90–120 cm) |
Treat these as planning examples, not fixed rules. A 24–36 in (60–90 cm) depth may suit a compact room; larger kitchens can accommodate deeper islands with storage on both sides. Prioritize circulation over appearance.
Consider a Rolling Island for Flexible Space
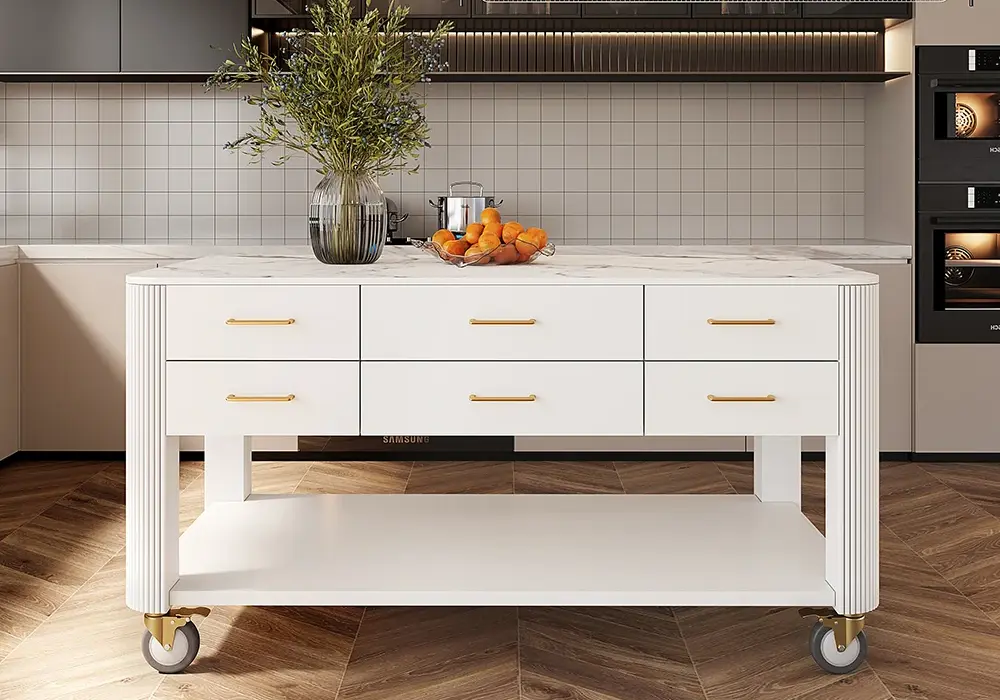
If you want extra prep space without a permanent fixture, the 60-inch white kitchen island with wheels offers a practical blend of flexibility and storage. Its rolling design makes it easier to reposition the island as your kitchen needs change, while the drawers, cabinets, and shelving help keep everyday essentials organized. Before adding it to your L-shaped kitchen, measure the available space to ensure there is enough room to move around the island and open nearby appliance doors.
Know When a Peninsula Is the Better Choice
If an island would reduce a main walkway below 36 in (90 cm), consider a peninsula, movable cart, or dining table instead. Before deciding, measure refrigerator depth and door swing, oven and dishwasher openings, windows, doorways, and the dining area's edge. Mark the proposed footprint with painter's tape and test the route.
Kitchen Island Clearance and Placement
Place the island to support work zones without blocking routes. Centering it on the L's longer run can look balanced, but circulation matters more. Keep the L's open end accessible where possible.
Use Practical Clearance Guidelines
For early planning, use these common kitchen-design benchmarks:
- 42 in (107 cm) for a working aisle used by one cook.
- 48 in (120 cm) for a working aisle where two or more cooks may pass or work together.
- 36 in (90 cm) for a general walkway that is not a working aisle.
These are widely used planning recommendations, not a substitute for local building codes or accessibility requirements. Confirm the rules that apply to your home and the way the kitchen will be used.
Protect the Main Traffic Routes
Trace routes between the entrance and work zone, refrigerator and dining table, kitchen and living room, and back door and pantry. Do not measure aisles with every appliance closed: an open refrigerator, dishwasher, or oven door can block passage. Test each door fully open and check that seated diners will not obstruct access.
Include Accessibility from the Start
For wheelchair access, a turning space around 60 in (150 cm) in diameter can be a useful target, subject to local standards. A lowered or seated prep section may also help. Review knee clearance, approach space, and appliance access with a qualified designer.
Work Triangle and Appliance Placement
Plan around the sequence prepare, cook, and clean. The traditional work triangle connects the refrigerator, sink, and cooktop; a combined distance of 13–26 ft (4–8 m), with each leg around 4–9 ft (1.2–2.7 m), is a useful guide. Adapt it for larger kitchens or multiple cooks.
Choose Between an Island Sink and a Wall Sink
An island sink lets the cook face the living or dining area, but requires plumbing and may leave washing-up items in view. A wall sink is often simpler when services already exist and keeps the island free for chopping, baking, or serving, though the cook may face away from the room.
Use three questions to decide:
- Do you want to face the living area while preparing food?
- Can plumbing and drainage reach the island without disproportionate cost or disruption?
- Is an uninterrupted preparation surface more valuable than having the sink at the center of the room?
Check Ventilation Before Adding an Island Cooktop
Ventilation is often the main limitation of an island cooktop. An appropriately sized overhead range hood is usually a practical choice when the ceiling and ductwork allow it. Downdraft systems may suit certain layouts, but performance varies by model and installation.
Before finalizing your island, check the required extraction capacity, duct routing, installation clearances, and local ventilation requirements with a qualified installer.
Position Supporting Appliances Around the Workflow
- Dishwasher: Beside the sink for easier loading.
- Waste and recycling: Near the prep surface.
- Microwave: Within reach but outside the hot-pan route.
- Pantry: Near the entrance or refrigerator for unloading groceries.
Keep landing space beside the sink and cooktop for ingredients and hot cookware, and avoid crossing busy routes during prep.
Kitchen Island Seating, Storage, and Corner Cabinets
An island can serve as a breakfast bar, homework station, or gathering place. Comfort depends on counter height, overhang, knee room, and stool size.
Get the Seating Measurements Right
- Standard counter height: 36 in (91 cm).
- Counter-height overhang: At least 12 in (30 cm); around 15 in (38 cm) often gives more comfortable knee room.
- Bar height: 42 in (107 cm).
- Bar-height overhang: Around 15 in (38 cm) is a common starting point, subject to stool design and knee clearance.
- Width per seat: Allow about 24 in (60 cm) per person.
A four-seat island needs roughly 8 ft (2.4 m) of seating edge. Allow extra space for broad stools, keep seats away from cooking, and ask whether the overhang needs support.
Make Island Storage Useful Every Day
Use deep drawers for cookware, pull-out bins near prep, and a concealed cabinet for small appliances. Shallow cabinets or open shelves on the seating side can hold tableware without reducing knee space.
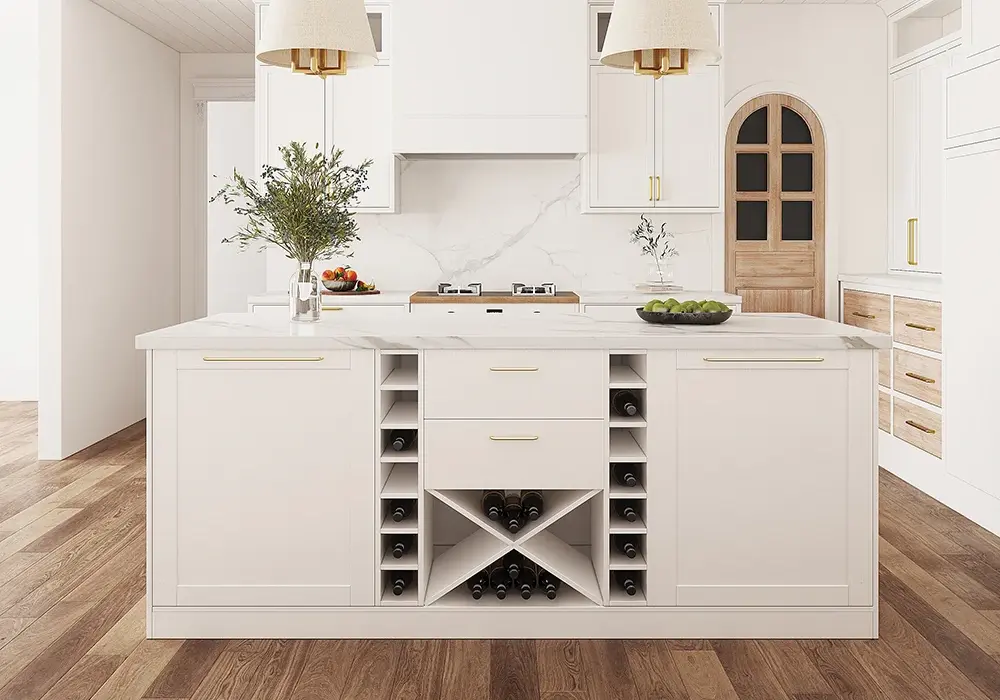
For entertaining, consider a 72-inch white kitchen island with wine storage. Its larger work surface and integrated wine storage suit serving drinks and keeping entertaining essentials close.
Select a Corner Cabinet You Can Reach
The corner where the cabinet runs meet can be difficult to access. Consider these options:
- Lazy Susan: Rotating shelves improve access.
- Blind-corner pull-out: Brings items out from a deep cabinet.
- Diagonal cabinet: Looks open but may sacrifice storage.
- Corner drawers: Improve access when supported by the cabinet system.
Choose for what you store most often; accessible space matters more than hard-to-reach capacity.
Kitchen Island Lighting, Power, and Costs
Lighting, electrical access, and service runs should be considered before finalizing the island, especially when it includes a sink or cooktop.
Layer Island Lighting for Prep and Dining
Hang pendants around 30–36 in (76–91 cm) above the counter. Two or three may suit the island; 24–30 in (60–75 cm) spacing is a starting guide. Combine pendants with ambient recessed and task lighting, coordinating fixtures with any hood to reduce shadows and clutter.
Plan Outlets, Plumbing, and Permits Early
Electrical requirements vary by jurisdiction. Confirm outlet, circuit, and protective-device rules; near sinks, check local GFCI or RCD requirements. A sink or cooktop may need floor access for pipes, wiring, drainage, and ductwork, plus permits or licensed contractors.
Identify the Main Cost Drivers
Costs depend on cabinetry, countertop material, appliances, ventilation, electrical work, and floor modifications. A storage-only island is generally simpler than one with plumbing, appliances, and ductwork. A lowered or seated prep section can improve usability without changing every counter.
L-Shaped Kitchen Island Planning Checklist
Before installation, complete three steps:
- Measure: Record both cabinet runs, openings, refrigerator depth, and usable floor space.
- Mark services: Note plumbing, drainage, electrical circuits, and ventilation routes.
- Set a budget: Photograph the room, tape out the island footprint, and decide on a realistic range.
A kitchen designer can catch clearance, door-swing, ventilation, and budget issues before work starts. Use a planning template or request a custom design suited to your room, cooking habits, and storage needs.
L-Shaped Kitchen with Island: FAQs
How much space do you need for an L-shaped kitchen layout with island seating?
Allow about 12 ft (3.7 m) of depth for a compact island, or 13–14 ft (4.0–4.3 m) with seating. Confirm the fit using actual appliance doors and clearances.
What is the minimum clearance around a kitchen island?
Allow around 36 in (90 cm) for a general walkway, 42 in (107 cm) for one cook's working aisle, and 48 in (120 cm) for multiple cooks, subject to local rules.
Should the sink or cooktop go on the island?
An island sink supports conversation and food preparation, while an island cooktop creates a central cooking station. Decide based on plumbing access, prep-space priorities, and whether suitable ventilation can be installed.
How much overhang do you need for island seating?
At a 36 in (91 cm) counter, allow at least 12 in (30 cm) of overhang; around 15 in (38 cm) is often more comfortable. Check stool dimensions, knee room, and structural support with your installer.
Can a small L-shaped kitchen fit an island?
Yes, if the layout preserves suitable walkways and working aisles. A compact island about 4–5 ft long (1.2–1.5 m) may fit, but a peninsula or rolling cart can work better in a tight room.
What electrical and plumbing work does an island need?
A storage-only island may need electrical access; a sink or cooktop adds plumbing or ventilation work. Check local codes, permits, and contractor requirements before construction.