

A patio furniture layout tool helps you see whether your outdoor sofa, chairs, and tables will fit before you buy. Start by measuring your usable patio space, entering the actual dimensions of your furniture, and comparing at least two layouts in 2D. Then use a 3D view to visualize the overall design and test your preferred arrangement on the patio before ordering.
The key is accuracy. A realistic rendering cannot make up for missing product dimensions or guarantee that a furniture model matches the set you plan to buy. Always verify the actual product specifications and check that the layout leaves enough room for walking, seating, and everyday activities.
In this guide, you'll learn how to choose a patio furniture layout tool, create an accurate floor plan, and compare three practical arrangements to find the best fit for your outdoor space.
Table of Contents
How to Choose a Patio Furniture Layout Tool
The best patio furniture layout tool is one that lets you represent your outdoor space accurately and compare furniture arrangements without unnecessary complexity. You may not need an elaborate 3D rendering if your main question is whether a sectional sofa will block a walkway.
Start with the simplest method that can answer your planning question.
Planning method | Best for | What to check |
Scaled paper plan | Comparing a few furniture arrangements quickly | Drawing scale and actual furniture dimensions |
Floorplanner | Creating a floor plan in a browser and viewing it in 3D | Account limits, available furniture models, and dimension accuracy |
RoomSketcher | Planning patios alongside outdoor zones, boundaries, and furniture | App requirements, available features, and object dimensions |
Floor tape or temporary objects | Testing a proposed layout at full size | Actual furniture footprint, access, and occupied space |
Floorplanner: For Quick 2D and 3D Comparisons
Floorplanner lets you create a scaled floor plan in a browser and switch to a 3D view. It can be useful when you want to compare sofa positions, rotate furniture, or see how an arrangement relates to the shape of your patio.
Its personal-use account has limits on projects and exports, so check the current plan before investing time in a detailed design.
RoomSketcher: For Outdoor Zones and Furniture Planning
RoomSketcher's outdoor-area guide explains how to draw outdoor areas, add separate zones, apply materials, and place furniture.
One important distinction is that RoomSketcher uses a downloadable app for creating and editing floor plans; its browser portal is used for project management and other online features. Review the current subscription options if you need particular furniture-library or 3D features.
When a Simple Plan Is Enough
A scaled paper drawing or a digital rectangle can be more useful than a realistic rendering when you know the dimensions of your furniture but cannot find an exact model in the tool.
The important question is whether the furniture footprint is accurate. A convincing 3D sofa that is the wrong size can lead to a misleading layout.
Step 1: Measure the Usable Patio Space
Begin by drawing the patio outline and recording its length and width. For an irregular patio, measure each section that affects furniture placement instead of treating the entire area as a rectangle.
Include features such as:
- Door openings and the space used by swinging doors
- Steps, posts, fixed planters, and built-in seating
- Drains, railings, and other features that must remain accessible
- Gates, garden paths, and the route between the house and the seating area
Pay attention to how people enter and leave the patio. A sofa may fit beside a doorway when the door is closed but obstruct access when it opens.
Use one measurement system throughout your plan. If you work in inches, enter every measurement in inches. After drawing the outline, verify one familiar dimension to make sure the scale is correct.
For an outdoor area with several connected zones, draw the patio, paths, and fixed features separately. This makes it easier to see where furniture can go without obstructing access to other parts of the yard.
Step 2: Create a Furniture Dimension List
Before placing furniture in your patio furniture layout tool, record the dimensions of every piece you intend to use.
For each item, note its overall width, depth, and height where relevant. Also record the dimensions of separate coffee tables, side tables, ottomans, and movable chairs.
Do not confuse seat dimensions with the overall footprint. A sofa's seat width does not include the full space taken up by its arms and frame.
Modular furniture needs particular attention. Adding together the listed widths of several pieces may not give you the correct assembled dimensions, especially when corner modules or connecting sections are involved.
Use the product's assembled configuration drawing when available. If the manufacturer supplies several approved arrangements, identify the one you plan to test.
Keep a short list of unresolved measurements. You can use a clearly labeled placeholder while exploring ideas, but do not rely on estimated dimensions for the final purchase decision.
Step 3: Add Accurate Furniture Footprints
Once your patio outline is complete, add the furniture you want to compare.
Look for an object that matches the intended furniture type and configuration. Check its dimensions rather than assuming that a visually similar catalog model is accurate.
RoomSketcher's furniture instructions explain how to find furniture, place it on a plan, move or rotate it, and adjust its size when supported.
Use these principles when building your layout:
- Enter the actual dimensions of your selected furniture wherever the tool allows it.
- Represent modular components according to the intended assembled configuration.
- Add separate tables, ottomans, and movable chairs individually when their positions may change.
- Label substitute objects with the product name and intended dimensions.
If the exact sofa is unavailable in the library, use a correctly sized rectangle or a group of simple shapes.
For planning purposes, an accurate footprint is more valuable than a realistic-looking object with incorrect dimensions. You can use the 3D view later to assess appearance, materials, and visual balance.
Step 4: Plan Walking Routes Before Decorating
With the furniture footprints in place, draw the main route from the house to the destinations people use regularly, such as a gate, garden path, or dining area.
Then check how people approach the seating itself. A path may appear clear on an empty plan but become inconvenient once someone is sitting in a chair or pulling out a dining seat.
Pay attention to the narrowest section of each route. The end of a sectional sofa, a planter beside a doorway, or a table corner can determine whether the overall arrangement works.
Consider these questions:
- Can people enter and leave the seating area without repeatedly moving furniture?
- Is the route to the house or garden obstructed?
- Can someone reach the coffee table without squeezing between seats?
- Does opening a door or moving a chair block the intended path?
There is no single spacing measurement that suits every patio. The appropriate space depends on the furniture, the activity, the users, and the site.
If your plan includes a fire pit or another outdoor appliance, use the actual appliance dimensions and follow its manufacturer instructions and applicable local requirements. A layout tool can help you visualize the arrangement, but it cannot establish that an installation is safe or compliant.
Step 5: Compare Three Practical Patio Furniture Layouts
Once the measurements and walking routes are in place, compare arrangements designed for different activities. Keep the patio outline and furniture dimensions consistent across versions so you can evaluate the differences fairly.
Rather than choosing a layout based only on appearance, record what each arrangement does well and where it creates constraints.
A Reading Lounge Along One Edge
A reading lounge works well when you want a comfortable seating area while keeping the rest of the patio open for other activities.
Place the sofa along a suitable edge, orient it toward a garden or another view, and position a coffee table within easy reach. Leave a clear approach to the seating area so people can sit down without navigating around the entire arrangement.
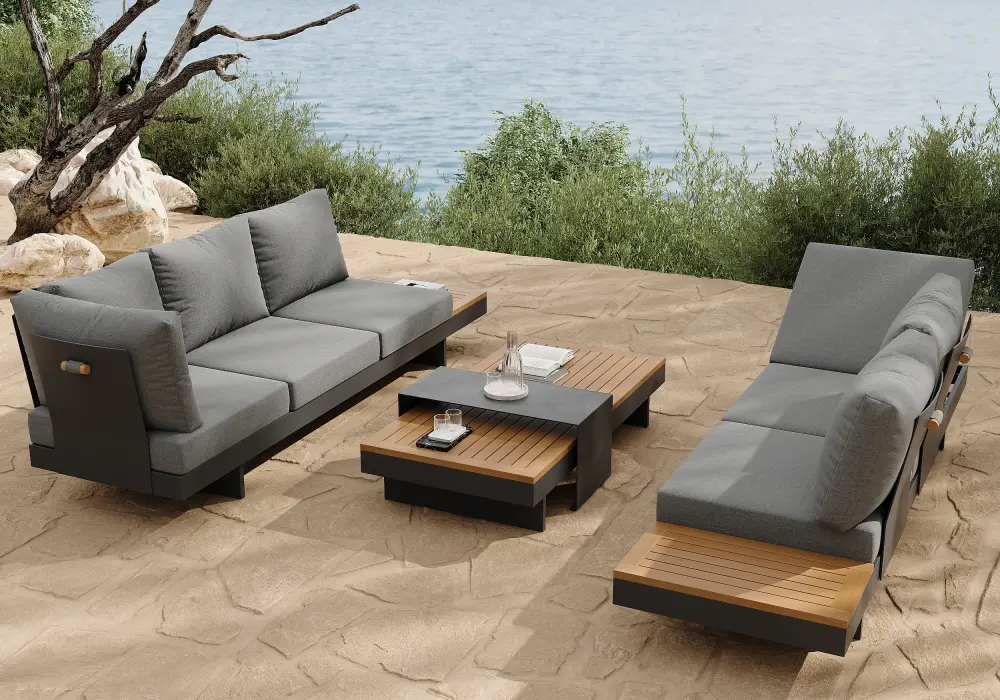
To see how this works in practice, consider the Tevara 4-piece outdoor teak and aluminum modular sofa set with coffee table. Enter the listed sofa dimensions of 96.5 inches wide by 30.7 inches deep and the coffee table dimensions of 55.1 inches wide by 27.6 inches deep into your patio furniture layout tool.
Position the coffee table in front of the sofa and compare different arrangements. For example, an 18-inch gap between the sofa and table would require 76.3 inches of depth for these two pieces and the gap combined (30.7 + 18 + 27.6). You would still need to account for any additional walking space beyond the table.
Use this calculation as a starting point, not a recommended clearance for every patio. Before finalizing the layout, verify that the sofa dimensions represent the complete L-shaped configuration and adjust the footprint if additional modules extend beyond the listed measurements.
A Conversation Group With an Open Approach
A conversation area should make it easy for people to face one another while leaving a clear way into and out of the group.
Arrange the seating around a shared surface, then check whether people at the ends can reach the table and leave their seats comfortably. Keep the main walkway separate from the space people use to move between seats.
Create two versions in your patio furniture layout tool: one with the full seating group and another with fewer seats or a more compact arrangement. Compare the remaining open space, access to the table, and the narrowest route through the patio.
If the larger group makes movement awkward, try removing a seat or repositioning a side table before changing the entire layout. The aim is to find a balance between seating capacity and usable space, rather than fitting in as many pieces as possible.
A Gathering Zone With a Fire Feature
A fire-feature layout requires more planning because the appliance affects both furniture placement and the space available for movement.
Start by checking whether the intended location is suitable for the appliance. Add the actual dimensions of the fire pit and surrounding furniture to your plan, and account for the clearances and access requirements specified by the manufacturer and applicable local regulations.
Compare two arrangements: one with seating grouped around the fire feature, and another with a conventional sofa-and-coffee-table setup. Evaluate how much space each option occupies, how people approach the seating, and whether the main route through the patio remains practical.
Do not judge the fire-feature arrangement by appearance alone. A 3D rendering can help you visualize the setting, but it cannot establish that an installation is safe or suitable for the site.
A separate layout for each option makes the trade-offs easier to see and helps you decide whether a fire feature adds enough value to justify the space it requires.
What to Record When Comparing Layouts
For each scenario, save the layout and note the following:
Comparison point | What to record |
Furniture footprint | Width and depth of the complete arrangement |
Walking routes | Narrowest sections and any obstructions |
Table access | Whether seats can reach the shared surface conveniently |
Space for movement | What changes when chairs are occupied or moved |
Unresolved details | Missing dimensions, configuration questions, or installation requirements |
These observations turn the layout tool into a decision-making aid rather than just a way to produce attractive images.
Step 6: Check the Layout With a Simple Calculation
A scaled plan is easier to trust when you verify its measurements with basic arithmetic.
Suppose you have a hypothetical patio section with 144 inches of usable depth. In one direction, you allocate:
- 36 inches for a sofa footprint
- 18 inches between the sofa and table
- 24 inches for the table footprint
- 48 inches beyond the table for a planned route or open area
The total is:
36 + 18 + 24 + 48 = 126 inches
That leaves 18 inches within the hypothetical depth.
These figures are illustrative planning inputs, not product specifications or universally required clearances. The calculation only confirms what the drawing contains; it does not establish whether the arrangement is comfortable, accessible, or compliant with any applicable requirements.
Repeat the calculation in the other direction. A layout might fit across the patio but fail where a sectional return approaches a door or a fixed planter.
When using a real product example, substitute the verified furniture dimensions for the illustrative measurements. Remember to include the table, intended gaps, and any routes or appliance clearances that apply.
Step 7: Use 3D for Appearance and Test the Layout in Real Life
Once the 2D plan works, use a 3D view if the tool supports it.
Look at how the seating relates to the house, planting, railings, and other outdoor features. Check the orientation and visual balance of the arrangement, then return to the 2D plan to verify the measurements.
Perspective can make gaps appear larger than they are. Do not use the 3D view as proof that a walkway or clearance is sufficient.
Before ordering, mark the preferred furniture footprints on the actual patio with painter's tape. For complex pieces, use lightweight boxes or temporary objects to represent the depth and position of the furniture.
Walk through the activities you expect to perform:
- Entering the patio from the house
- Sitting down and standing up
- Reaching a coffee table or side table
- Moving between seats
- Carrying food or drinks
- Returning indoors without blocking the seating area
If something feels awkward, adjust the digital plan and repeat the test.
Save the final layout with the selected product names, dimensions, configuration, and unresolved questions. Then compare the plan against the latest product specifications before ordering.
The best patio furniture layout is not necessarily the one with the most furniture or the most attractive rendering. It is the one that fits the space and works for the people who will use it.
Frequently Asked Questions
Can I Use an Indoor Floor Planner for Patio Furniture?
Yes, provided it can represent your outdoor outline, fixed features, and furniture dimensions accurately. Check whether the tool supports outdoor zones or allows you to create a custom shape. Even a basic indoor-style floor planner can be useful for checking furniture footprints. However, it may not account for site conditions or outdoor appliance requirements. Those need to be checked separately.
Do I Need an Exact 3D Model of My Sofa?
No. For checking whether furniture fits, a correctly dimensioned shape is often sufficient.
Use a realistic 3D model to assess appearance when it matches the intended product and configuration. If you use a substitute, label it clearly and verify the actual product measurements before ordering.
Can a Patio Furniture Layout Tool Tell Me Which Sofa Size to Buy?
It can help you compare different sizes and configurations, but only if you supply accurate measurements and account for access and movement.
The tool cannot resolve missing product specifications or determine your personal comfort preferences. Combine the layout with product information and a full-size test on your patio.
Should I Plan the Whole Set or Each Piece Separately?
Start with the intended assembled configuration so you understand the overall footprint. Then add separate tables, ottomans, and movable chairs where their positions may change.
For modular sets, confirm which components can be rearranged and which configurations are supported. A set's piece count does not establish the dimensions or flexibility of every arrangement.
Is a Good-Looking 3D Layout Ready for Ordering?
Not by itself. Check the 2D dimensions, walking routes, actual furniture configuration, site conditions, and any applicable appliance requirements.
Mark the preferred plan on the patio and resolve missing measurements first. A 3D rendering helps you visualize the result, but it is only one part of the buying decision.
What Should I Check Before Buying Patio Furniture?
Confirm the assembled dimensions, the size of separate tables and accessories, the modules included in the selected set, and the space needed for everyday movement.
Also review the product specifications, assembly requirements, and any relevant installation instructions. A saved layout makes these checks easier because you can compare the same dimensions against each option.