

The kitchen island has a way of becoming the center of everything. It is where meals get prepped, coffee gets poured, homework gets done, and friends tend to gather during a dinner party. Because it serves so many purposes, styling it takes more thought than simply adding a vase or fruit bowl.
Knowing how to style a kitchen island starts with the way the space is used. You need enough open counter for everyday tasks, enough room around the island for people to move comfortably, and decor that suits the countertop material and the rest of the kitchen. Seating, storage, and lighting all play a part, too.
This guide breaks the process into five areas: how the layout affects your styling options, how to decorate the countertop, how to work seating and storage into the design, how to choose island lighting, and how to change the look for entertaining or different budgets.
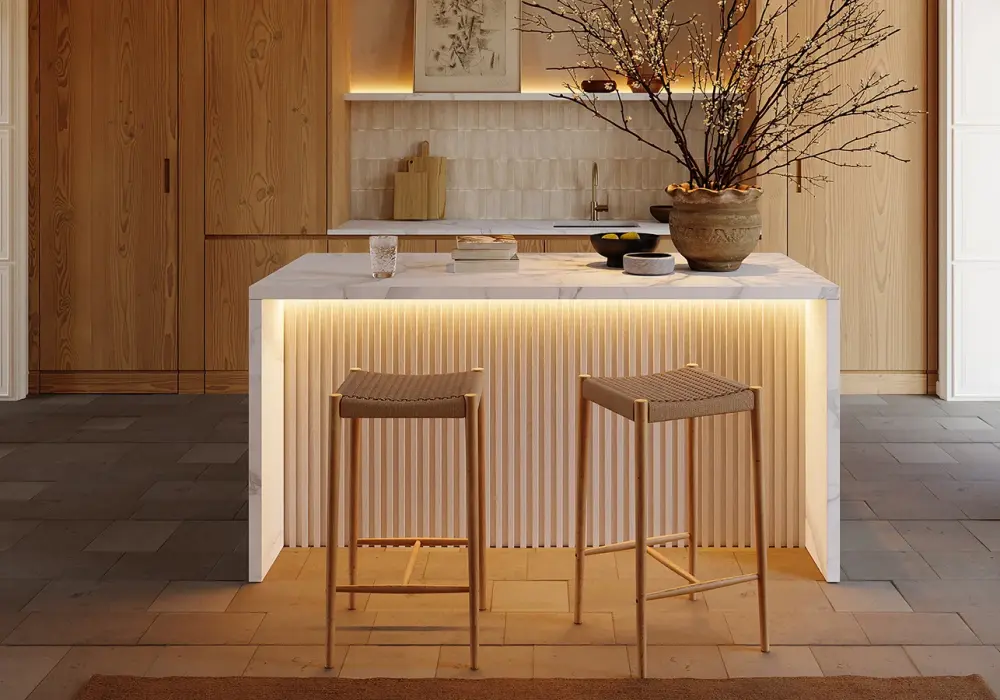
Modern 1829mm White Kitchen Island
Table of Contents
Start With the Right Foundation — How Layout Shapes Your Styling Choices
Before you buy anything for the countertop, look at the island itself and the space around it. Its size, position, and seating arrangement set limits on what will actually work. A narrow island beside a busy walkway, for instance, has very different styling needs from a large island with a generous work surface.
A well-decorated island should still feel easy to use. Once you know which parts of the counter need to stay clear, you can decide how much room is available for accessories.
Allow Enough Clearance for Everyday Movement
A 914mm walkway is a common minimum planning benchmark for a kitchen island. For a working aisle, 1067mm is a useful starting point for one cook, while 1219mm gives multiple cooks more room to work. These figures are planning guidelines rather than a replacement for local building codes or project-specific requirements.
Those measurements also affect your decorating choices. An island with limited clearance should not be dressed with accessories that stick out into a walkway. A low tray, compact bowl, or single vase takes up much less usable space than a large centerpiece.
The same principle applies to the work surface. If you use the island for chopping, baking, or serving, leave a dedicated prep area rather than covering the counter from end to end.
Plan the Seating Overhang Around How the Island Is Used
Seating changes the footprint of the island as well. A useful planning benchmark is about 381mm of knee-space depth at a 914mm-high counter and about 305mm at a 1067mm-high counter. Allow roughly 610mm of seating width per person.
You do not need to turn the island into a math exercise, but these dimensions are useful when you are deciding how many stools will fit and how far apart to place them. Oversized stools packed tightly together can make even a large island look crowded.
Match the Island to the Scale of the Kitchen
Scale matters on both sides of the counter. A small island can disappear beneath a large pendant or oversized centerpiece, while a long island can look unfinished when it has only one tiny accessory in the middle.
Look at the island from the main entrance to the kitchen. Its decorative elements should have enough visual weight to relate to the cabinetry, appliances, and room as a whole.
It also helps to separate the island into three practical areas: the work surface, the seating area, and the part of the counter used for decor. Those zones can overlap, but the work area should remain easy to reach and easy to clear.
Countertop Styling — Materials and Decor That Last
The countertop is where most kitchen island decor lives, so the material under those accessories matters. Stone, wood, stainless steel, and concrete have different textures and maintenance needs, and some decor materials wear better on certain surfaces than others.
Rather than choosing accessories based only on appearance, consider what the counter has to put up with each day: water splashes, cooking oils, crumbs, hot cookware, and frequent wiping.
Build a Simple Countertop Styling Formula
A reliable starting point is a tray, bowl, and greenery arrangement. The tray gives the grouping a defined footprint, the bowl adds height and function, and a plant or herbs bring in a softer texture.
A more pared-back kitchen may need less. Try a large ceramic vase paired with a wooden cutting board, or a statement bowl placed beside a stack of cookbooks. The goal is to give the eye a focal point without covering the surface you actually use.
For farmhouse, transitional, and organic-inspired kitchens, a cutting board, stoneware bowl, and linen towel can bring in warmth without feeling overly decorated.
Countertop material | Decor that works well | Watch-outs |
Stone or quartz | Ceramic bowls, wood boards, metal trays, glass vessels, greenery | Natural stone may need extra care around oils and moisture; avoid dragging rough objects across polished surfaces |
Wood | Ceramic pieces, woven trays, stoneware, protected herb pots | Standing water can stain or damage wood; use a tray or saucer beneath plants |
Stainless steel | Glass, matte ceramics, wood accents, simple trays | Fingerprints and grease show easily, so choose accessories that are quick to lift and clean |
Concrete | Warm wood, handmade ceramics, brushed or black metal | Sealed concrete is easier to maintain; wipe up spills promptly and avoid standing moisture |
Add Herbs and Greenery for Natural Texture
Herbs are especially useful because they bring color and texture to the island and can be used while cooking. Basil, rosemary, thyme, and mint are all worth considering in a bright kitchen, as long as the available light and watering conditions match the plant.
Not every kitchen has enough natural light for herbs. In that case, a small low-maintenance houseplant can fill the same decorative role.
Use a waterproof saucer or shallow tray underneath any potted plant. Even a few drops of standing water can leave marks on some countertops, particularly wood.
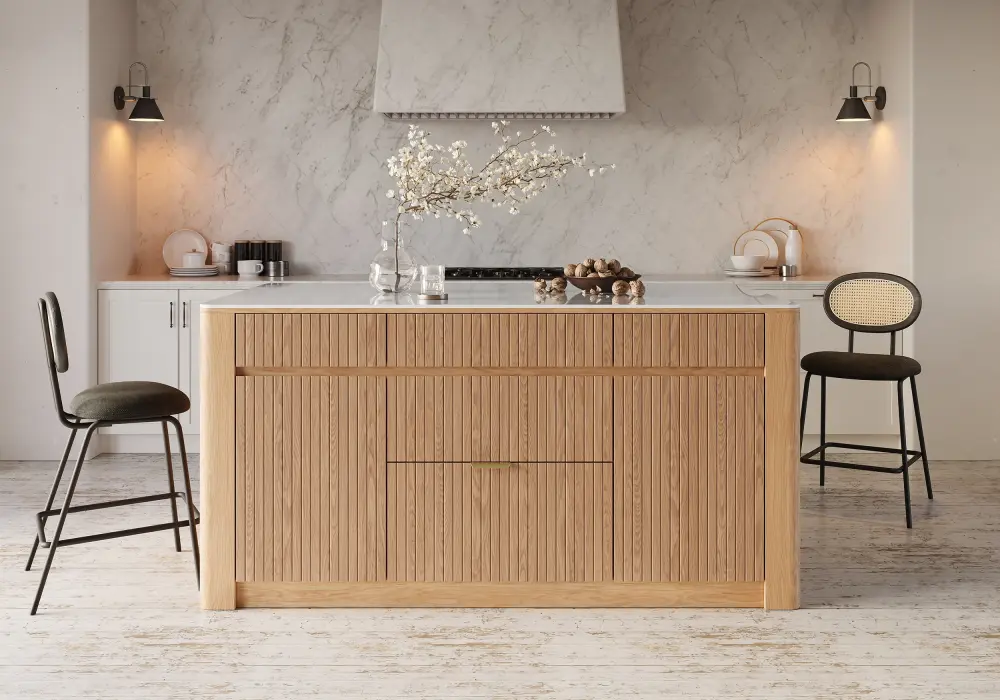
Glossy Sintered Stone Top Kitchen Island
Keep the Main Work Zone Clear
The easiest way to avoid clutter is to decide what the island is actually used for before adding accessories. If the counter doubles as a baking station, decorative pieces should stay toward one end or on the seating side.
You should not have to move several objects every time you prepare a meal.
Three well-sized pieces can be enough for a medium island. On a very long island, a pair of arrangements at opposite ends may look more balanced than one small cluster in the center.
Choose Decor That Holds Up to Kitchen Conditions
Glazed ceramics, washable trays, sealed wood, and smooth metal are relatively straightforward to clean. Porous materials, untreated wood, woven fibers, and light-colored fabrics need more care because they can absorb moisture or show stains.
Fragile or hard-to-clean accessories are also better placed away from food preparation. They are less likely to get splashed, knocked over, or covered in crumbs.
Repeat Materials Already Used in the Room
A polished island arrangement does not require matching accessories. Instead, repeat finishes that already appear elsewhere in the kitchen.
A brass-framed vase can echo cabinet hardware. A warm wood board can connect to hardwood floors or wood bar stools. Ceramic accessories can pick up the finish of nearby pottery or backsplash details.
Repeating a few materials is enough to make the arrangement feel connected without looking overly coordinated.
Styling the Functional Layer — Seating and Storage That Still Look Good
Once the countertop is styled, look below it. Stools and storage have a surprisingly strong effect on the appearance of a kitchen island. A row of bulky stools can visually weigh down an otherwise light kitchen, while poorly organized drawers can lead to clutter that quickly spills back onto the counter.
Treat those practical elements as part of the design from the beginning.
Match Stool Height to Island Height
The stool height should match the height of the island. A kitchen island around 914mm high generally pairs with counter-height stools, while an island around 1067mm high calls for taller bar-height seating.
The shape matters, too. Upholstered stools soften a kitchen with lots of hard surfaces. Wood, woven, or metal stools work well when you want a simpler or more architectural look.
Choose a silhouette that fits beneath the island instead of competing with it. A thick frame and oversized back can make a narrow island feel much heavier.
Space Stools for a Cleaner Visual Rhythm
Allow roughly 610mm of width per seated person as a planning benchmark.
That does not mean every stool needs exactly 610mm from center to center. Wide seats need more room, while slim backless stools can sometimes be arranged more closely. What matters is leaving enough space for people to sit down, get up, and use the counter without bumping into the person next to them.
Use Hidden Storage to Reduce Visual Clutter
Hidden storage is particularly valuable on an island because it keeps everyday items out of sight. Drawer dividers work well for utensils, while pull-out organizers make deep cabinets easier to reach. Integrated trash and recycling bins keep one of the messiest parts of kitchen life out of view.
Open shelving takes a little more editing. Use it for items worth displaying—such as cutting boards, cookbooks, bowls, or matching storage containers—rather than anything that simply needs somewhere to go.
Budget tier | Storage ideas | Styling effect |
Low | Drawer organizers, shelf risers, labeled bins | Keeps loose items contained without modifying cabinetry |
Mid | Pull-out organizers, trash and recycling inserts, fitted drawer dividers | Gives the island a more organized, built-in appearance |
High | Custom drawer systems, integrated appliance storage, concealed bins | Keeps frequently used items accessible while minimizing visible clutter |
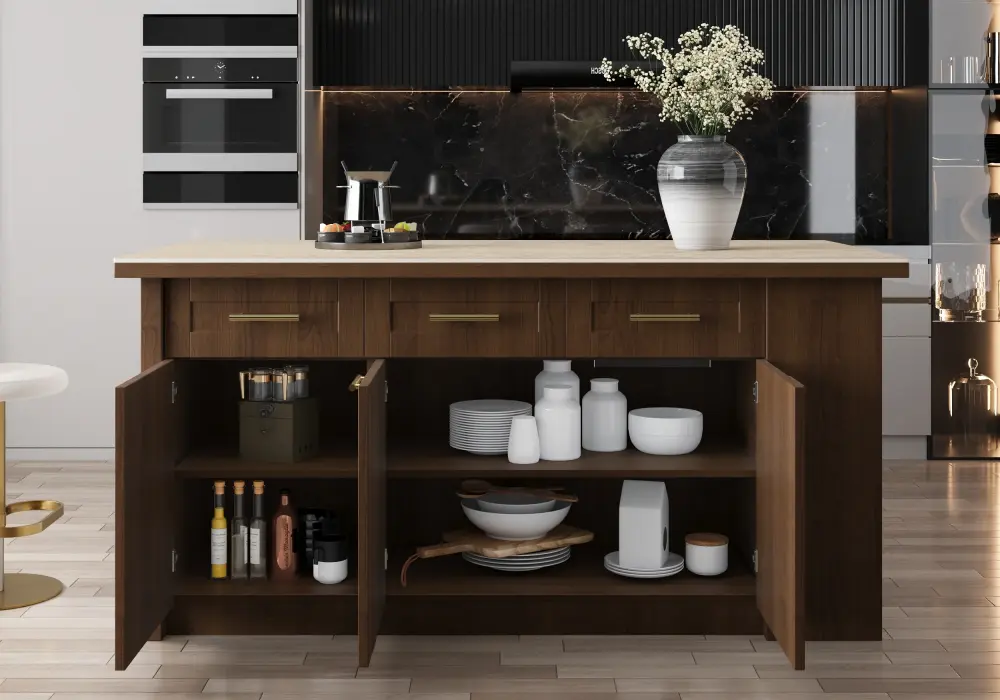
Modern 1803mm Sintered Stone Kitchen Island
Make Island Styling Work for a Family Kitchen
A family kitchen calls for accessories that can handle real use. Secure freestanding decor so it cannot be easily knocked over, and avoid sharp-edged objects where children sit or pass by.
For upholstered stools, washable or easy-care fabrics are worth considering. Rounded baskets and simple ceramic pieces are easier to live with than delicate accessories that need constant attention.
Use a Quick Reset Before Guests Arrive
Start with the seating. Line up the stools so the gaps look intentional. Then clear the main prep area and give everyday countertop items a designated home, whether that is a tray, drawer, or cabinet.
Take a step back from the island and look at it from the doorway. That view often reveals clutter that is easy to overlook when you are standing directly beside the counter.
Lighting — Choosing Pendants That Complete the Look
Lighting finishes the composition, but it also needs to work hard. The pendants above the island should illuminate the counter without blocking sightlines or looking out of scale with the room.
Once the countertop and stools are in place, it is easier to judge how much visual weight the lighting should carry.
Start With Pendant Size and Island Width
One practical starting point is to choose a pendant with a diameter about 305mm smaller than the island's narrowest dimension. A 914mm-wide island, for example, could work with a pendant around 610mm in diameter.
That formula is only a starting point. A large glass pendant feels lighter than a solid metal shade of the same size, so visual weight matters as much as the measurement.
Long islands often look better with two or three smaller pendants or a single linear fixture rather than one oversized light.
Set the Hanging Height Before Finalizing the Arrangement
A common range is 711mm to 914mm between the bottom of the pendant and the countertop, with 762mm to 914mm frequently used as a starting range.
Higher ceilings may call for a different hanging height, particularly when the goal is to maintain an open view across the kitchen. The fixture should feel connected to the island rather than floating too high above it.
Space Multiple Pendants Evenly
For two pendants, dividing the island length into four gives you a useful starting point for locating each fixture. With three pendants, dividing the length into thirds provides a similar starting layout.
The final spacing should account for the size of the shades. Large fixtures need more breathing room than small glass or open-frame pendants.
Choose a Light Color That Fits the Room
Warm white light in the 2700K to 3000K range works well for kitchens with warm woods, creamy cabinetry, and traditional finishes. A cooler temperature can suit a crisp, contemporary space.
A dimmer gives you more control throughout the day. Bright task lighting is useful while cooking, while a lower setting creates a softer atmosphere when the kitchen becomes a gathering space.
Select Fixtures That Are Easy to Clean
Grease and dust eventually find their way onto kitchen fixtures, so smooth, wipeable surfaces are easier to live with. Glass shades and simple metal fixtures are generally quicker to clean than heavily textured designs.
The finish should also relate to the rest of the room. Matching the pendant to cabinet hardware, the faucet, or other metal details helps the fixture look like part of the kitchen rather than an isolated decoration.
Styling for Entertaining, Seasons, and Any Budget
An everyday island does not have to look the same every weekend. Once the basic arrangement is established, a few small changes can shift it from a weekday workspace to a place for serving drinks, displaying seasonal decor, or hosting guests.
Create an Easy Entertaining Setup
For a casual gathering, clear the main prep surface and turn one end of the island into a serving area. A large tray can corral drinks, snacks, or glassware, while the opposite side remains available for plating and preparation.
In summer, fruit, fresh herbs, and lightweight linens bring in color without requiring a major change. Around the holidays, a low garland, seasonal branches, or a few candles can add atmosphere. Keep anything decorative away from hot pans and high-traffic areas.
Adjust the Look to Fit Your Budget
You do not need to replace everything at once. A low-budget refresh might involve rearranging pieces you already own, adding a bowl of fruit, or bringing in fresh greenery.
A mid-range update could focus on a new pair of stools, a statement bowl, coordinated storage containers, or updated pendant shades. A larger project might include custom storage, new lighting, or higher-end seating.
Budget | What to add | Quick swap |
Low | Tray, bowl, greenery, existing cutting boards | Rearrange and edit what you already own |
Mid | New stools, statement bowl, pendant update, coordinated containers | Replace one prominent item instead of the entire arrangement |
High | Custom storage, designer stools, statement lighting, premium accessories | Coordinate the island with a broader kitchen redesign |
Ready to Style Your Kitchen Island?
A simple measurement and layout checklist can take much of the guesswork out of an island refresh. A budget-based shopping list is useful when you want to know where to spend and where a lower-cost swap will work just as well. A 10-step styling guide makes the process easier to repeat when you change accessories or prepare for guests.
A free checklist can cover the basics, while a paid design consultation can make sense for larger decisions involving proportions, lighting, storage, or a full kitchen update.
For any new seating, lighting, countertop modification, or installation work, follow the manufacturer's instructions and applicable local requirements. A well-styled island should fit the way you cook, clean, eat, and gather every day.
FAQ
How much clearance do I need around a kitchen island for comfortable traffic and cooking?
A 914mm walkway is a common minimum planning benchmark. For a working aisle, 1067mm is a useful starting point for one cook, while 1219mm gives multiple cooks more room to work. Local building codes and the specific kitchen layout may require different dimensions.
What pendant size and hanging height work best for different island widths and ceiling heights?
A pendant about 305mm smaller than the island’s narrowest dimension is a useful starting point. For hanging height, 711mm to 914mm above the countertop is a common range. Fixture shape, ceiling height, and visual weight may call for adjustments.
Which countertop decor items are safe near food prep?
Stable, easy-to-clean accessories such as glazed ceramics, washable trays, sealed wood boards, and planters with waterproof saucers work well near food preparation. Porous or fragile pieces are better placed farther from the main work area, where they are less likely to absorb moisture, collect food residue, or get knocked over.
How do I choose the right stool height for a counter-height vs. bar-height island?
Match the stool height to the island. A counter around 914mm high generally pairs with counter-height stools, while an island around 1067mm high generally calls for bar-height stools. Seat width, legroom, and spacing between stools also affect how comfortable the seating feels.
What storage solutions work best for small kitchen islands?
Hidden storage is usually the most useful starting point. Drawer dividers, shelf risers, pull-out organizers, and concealed trash or recycling bins keep frequently used items organized without taking up valuable countertop space. Open shelving can also work, but it looks best when limited to a small selection of useful or decorative pieces.
Can you suggest low-, mid-, and high-budget ways to style a kitchen island?
For a low-cost update, rearrange existing cutting boards, bowls, trays, and greenery before buying anything new. A mid-range refresh might include new stools, storage accessories, a statement bowl, or updated pendant shades. A larger budget can cover custom storage, statement lighting, premium seating, or a broader kitchen redesign.